


This page explains the essential parts of your radio service. If you are new, start here.
Step 1: Log in to your streaming panel
Open the login link provided in your welcome email and sign in with your username and password.
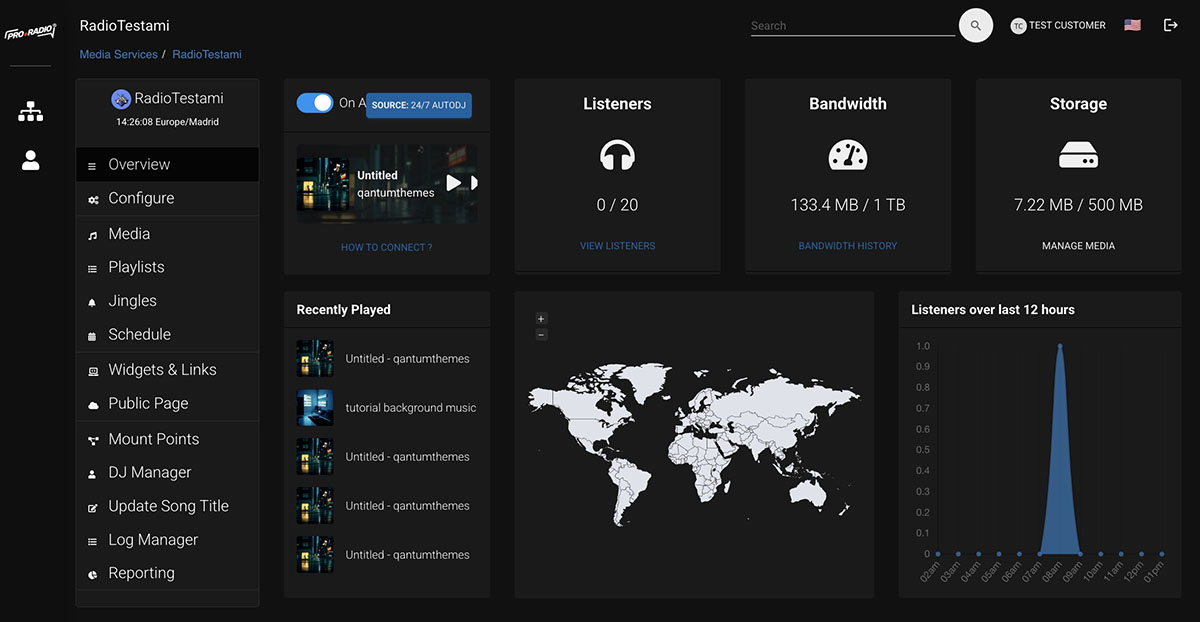
Step 2: Open your radio dashboard
After login, open your radio service. This main page is your control center. Here you can quickly see if the radio is online, what is playing, how many listeners are connected, and how much storage and bandwidth you are using.
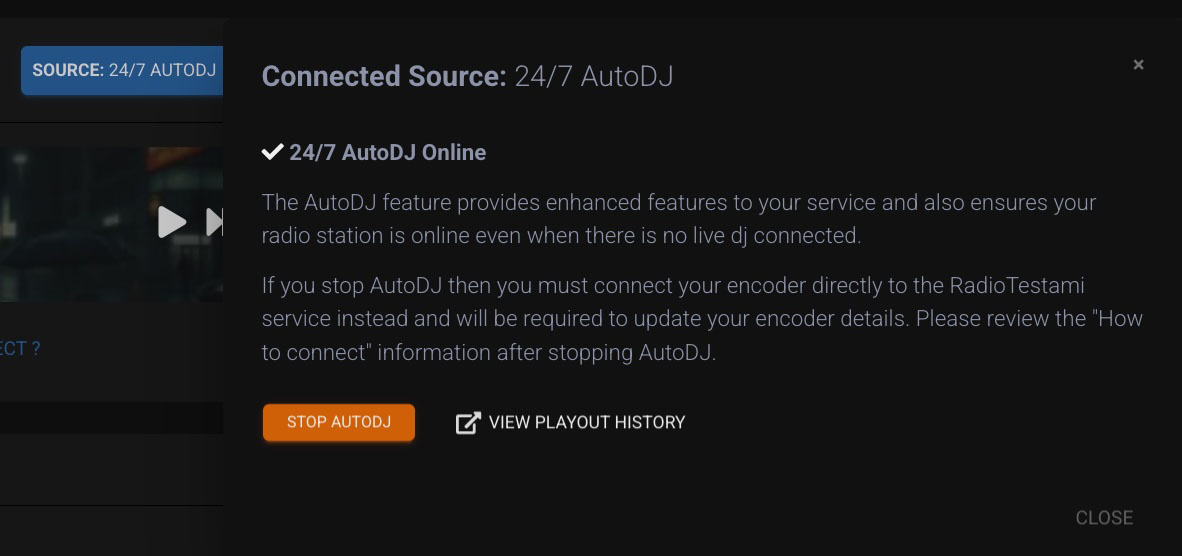
Step 3: Check if AutoDJ is enabled
AutoDJ is the system that plays your uploaded audio automatically when no live DJ is connected. If you want a 24/7 radio, this is the feature you will use most.
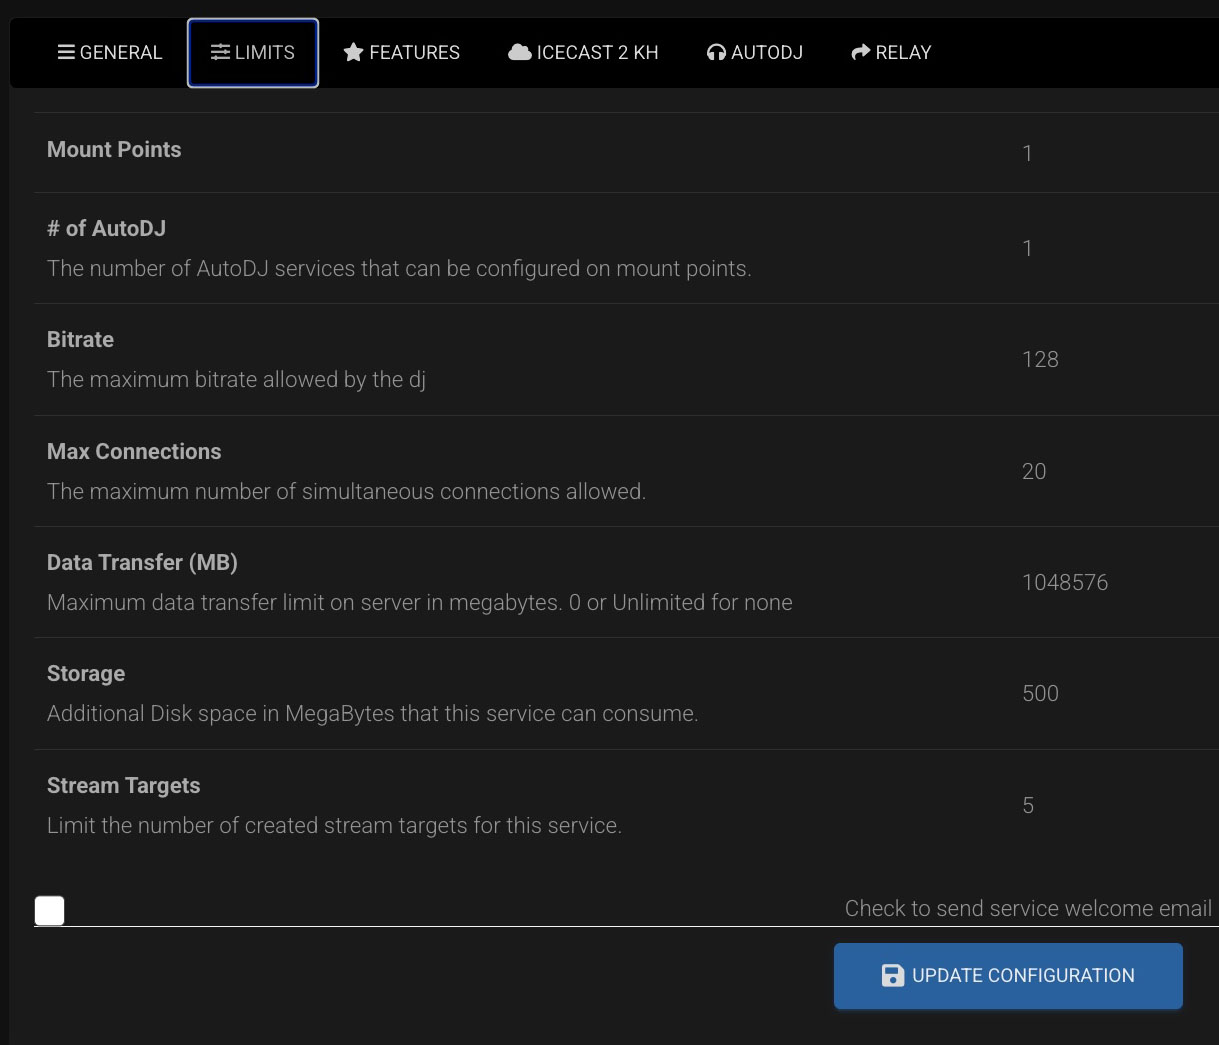
Step 4: Review your main service details
From the overview page, check the service type, bitrate, listener limit, server details and current status. This is also the best place to confirm that your stream is running correctly.
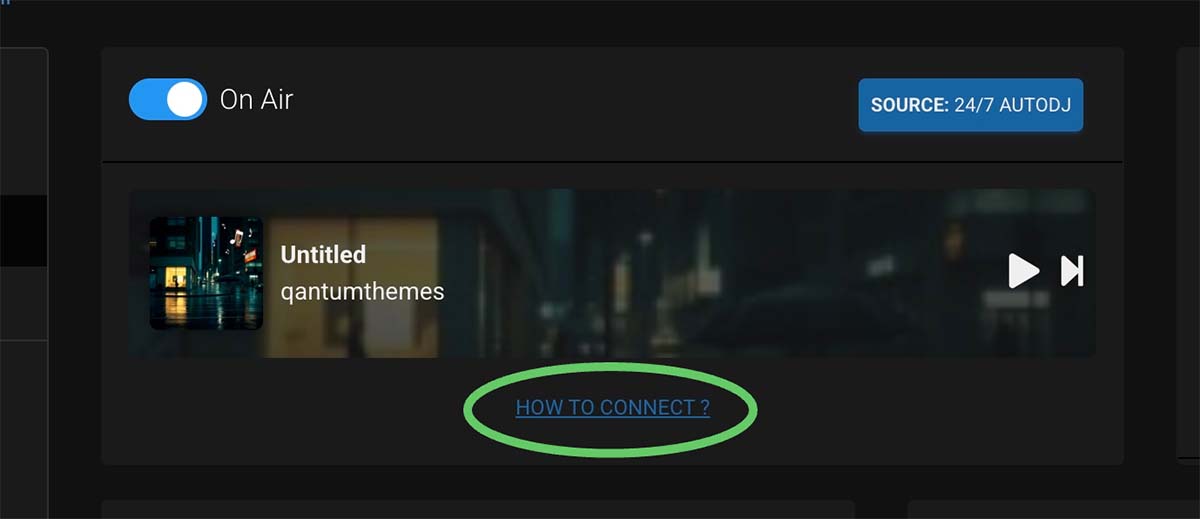
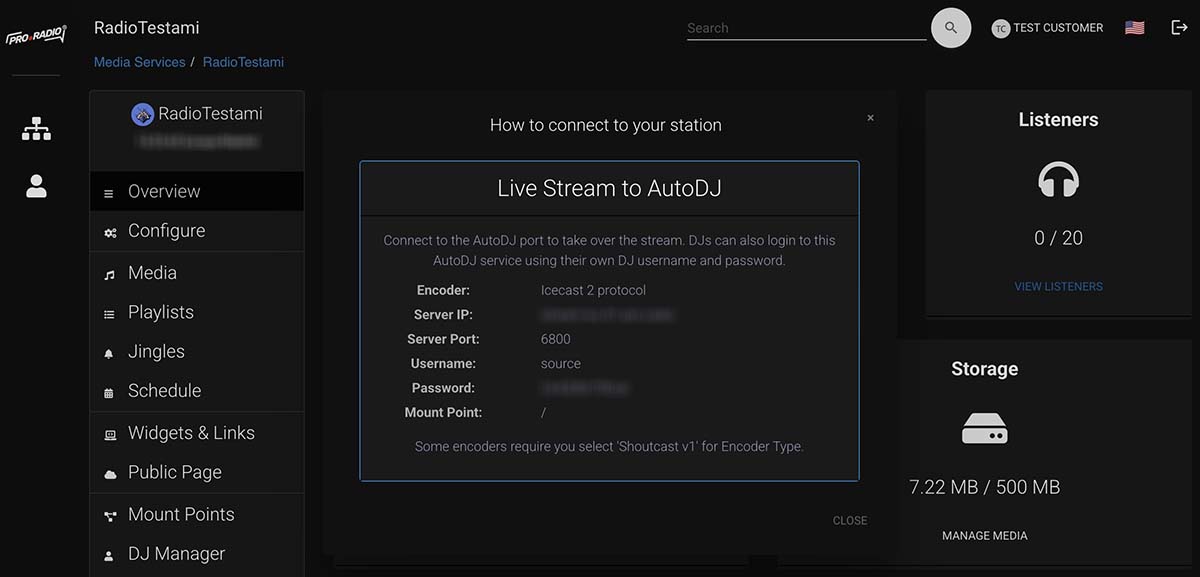
Step 5: Find your connection details
In the service overview, look for the connection details or the area called How to connect. This section shows the server, port, username and password needed for live streaming software.
It is possible to create separate logins for each DJ that connects to your audio streaming station, from the Dj Manager page.
Step 6: Save your settings
If you change station details such as title, description or public information, save your changes before leaving the page.
Tips
- If something is not playing, always check the overview page first.
- If AutoDJ is off, your uploaded music will not be broadcast automatically.
- If listener numbers are zero, first confirm that the stream is actually online.
